In this series of articles we’ll setup a single node Docker Swarm server with Traefik infront to proxy traffic to the right service. Then we will prepare a node project and deploy it to the server.
- Part 0 - Get a server
- Part 1 - Setup server. Basic security, install tools etc
- Part 2 - Setup Docker and configure Traefik with Let’s Encrypt
- Part 3 - Manual deploy of a Node.js app
- Part 4 - Automated deploy with CI/CD using Buddy
This is part 0 - Get a server.
If you know how to get a server and have a clean one with access you can skip this step and move to Part 1.
Get a server
First of all, we need a server. I like to use DigitalOcean or Hetzner for this, but you can use whatever you like, or even run one locally in a VM to start.
If you doesn’t yet have an account at DO, register here. Then click the button up to the right, and click Droplet.
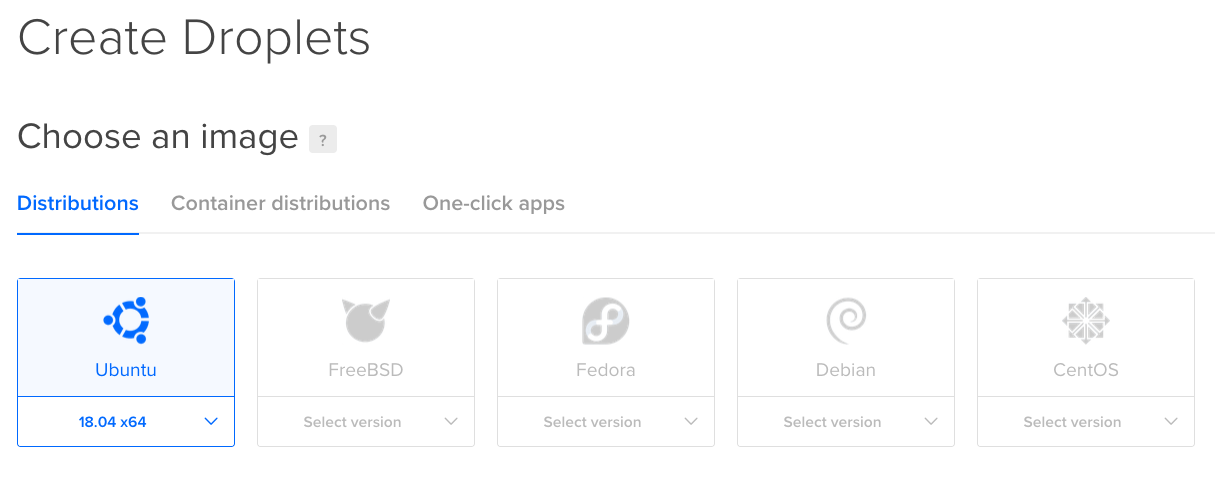
We will use Ubuntu 18.04 for the server.
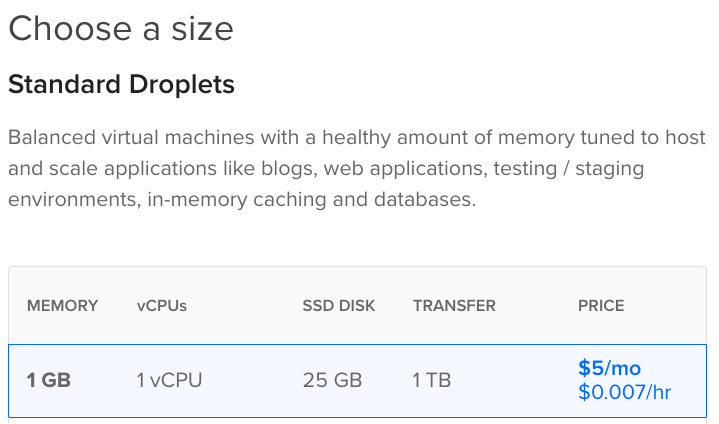
Next step is choose a size. I’m running the cheap 5$ a month without any problems.
You can skip backups if it’s just for educational purpose, but if you’re going to use this in a more serious way, you should definitely use backups!
- Blockstorage is not needed for this either.
- Datacenter location. Choose the one that is nearest to your location.
- Additional options choose
Monitoring. - Then add your SSH public key.
If you’re on a mac run, pbcopy < ~/.ssh/id_rsa.pub to copy your public key. Then paste it into the box.
Choose 1, and change name if you want. Then click the magic green button, Create.
Now you have a new, fresh empty server to play with! Copy the ip from your new Droplet:
 To log into the server, open your terminal of choice and simply run:
ssh root@142.93.XXX.XX
When asked to trust the new server writer Yes and continue - and voila!
Next up
Now when you have a server ready it’s time to get working. Go to Part 1!